Overall I am very pleased with our garment and I feel that Lily, Chelsea and I got on very well and collaborated excellently as well as learning new skills from each other. I found collaborating my designs with other designers a very worthwhile exercised as it is something I have never done before; it opens up your mind to alternative solutions and methods of designing, cutting and construction. If we were to do a professional photo shoot I think it would be interesting to play around with the transparency of the fabric. If I was to have designed this just from my concept I would have liked to have got my kaleidoscope images printed onto fine silk and replaced the chiffon with this and shone light through it and played with the twists a bit more. I would also recommend making a full scale toile before attempting the final garment instead of what we did which was to make a half scale toile as working with the amount of fabric that we did in the full scale is very different and difficult to predict, but this was part of the fun of this method.
Wednesday, 1 December 2010
Constructing our final garment...
We started off by laying out three different fabrics that were 2 mtrs long and of various widths (approx 1.5 mtrs.)
We the pinned and sew these together to create one long piece of fabric, we then sew up the sides to create our pillow case.
Time to start our pattern...
The darts on the front and back of the bodice need to be at the top because of the positive and negative place meaning this is the only place we will be able to access them.
When we had cut both pieces of the bodice we placed them on our pillow case...keeping in mind which shapes and positions worked for our toile. We then drew from one underarm to another.
We then cut around our pattern and out lines. This is the shape that has been cut away...
This is what it looks like so far...
We used our bodice pattern again to cut out our lining. We wanted our lining to be short so it would not get in the way of the transparency of the skirt. We then sew up the darts on both the frount and back of the lining and on the bodice.
We then placed and cut our circles...
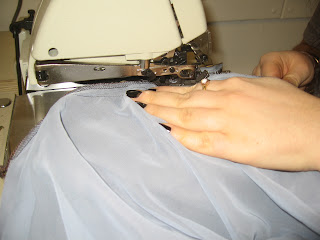
We sew them together and over locked them because of the fine fabric.
We cut 4 circles to create 2 tunnels...this is how it looked after cutting one...
We then added in the invisible zip down the side of the bodice and the lining.
Finally we over locked the hem and sew it to the bottom of the lining (missing the zip)
Finished dress...
Manufacturing Sheet...
It was important that we had a manufacturing sheet as when constructing the garment there was only ever two of the three of us making it at once. This allowed us to communicate the details of the construction to each other.
Toile...
we made a subtraction cutting toile to half scale and then started to draw addaptions that we would like to have on the boddice onto the fabric.
we made a note of where we placed the circles to create the tunnels and what shape we cut out of the armpit holes in the boddice so we would know what to change if we did not like the toile.
Design Collaboration
I collaborated my designs with Lily Stodel and Chealsie Williams. Both Chealsie and Lily had incorporated layering into their designs and Chealsie and me had both focussed on subtraction cutting. Lily’s designs involved a lot of transparency and bra like tops. We decided to take surrealism from Chealsie work and the layering from both lily and Chealsie. We will use subtraction cutting to incorporate the twisting of fabric to fit into my concept and have a structured bra like bodice with a layered vest underneath which has come from lily’s work. When we first started designing we thought about having the pillow case made of two fabrics and then a third would be sewn in the shape of an animal’s head as a patch, but after making a toile and drawing this on we discovered that it would not create an ascetically pleasing or interesting shape when cut. So we have chosen to go with this design...
Subscribe to:
Comments (Atom)


